
- HybriLIT Platform Software and Hardware Environment
- Job Queues
- Data Storage and Processing Systems
- Basic steps for making calculations on the platform
- Getting Started: Remote Access to the Platform
- Lmod Module System
- Basic Linux Commands
- SLURM Job Scheduler
- Compilation and Execution of OpenMP Applications
- Compilation and Execution of MPI Applications
- Intel Compilers
HybriLIT Platform Software and Hardware Environment
The HybriLIT training and testing facility is built on compute nodes equipped with multi-core Intel processors and NVIDIA GPU accelerators (see the Hardware section for details).
Compute Node Types
- CPU nodes with Intel Xeon Phi 7290 multi-core processors
- CPU nodes with Intel Xeon E5-2695 v2 multi-core processors
- GPU nodes with Intel Xeon E5-2695 v3 multi-core processors and NVIDIA K80 GPUs
- GPU nodes with Intel Xeon E5-2698 v4 multi-core processors and NVIDIA V100 GPUs
Job Queues
Jobs are submitted by placing them into a queue associated with a user account. Since HybriLIT is a heterogeneous platform, separate queues have been created to support different types of computing resources.
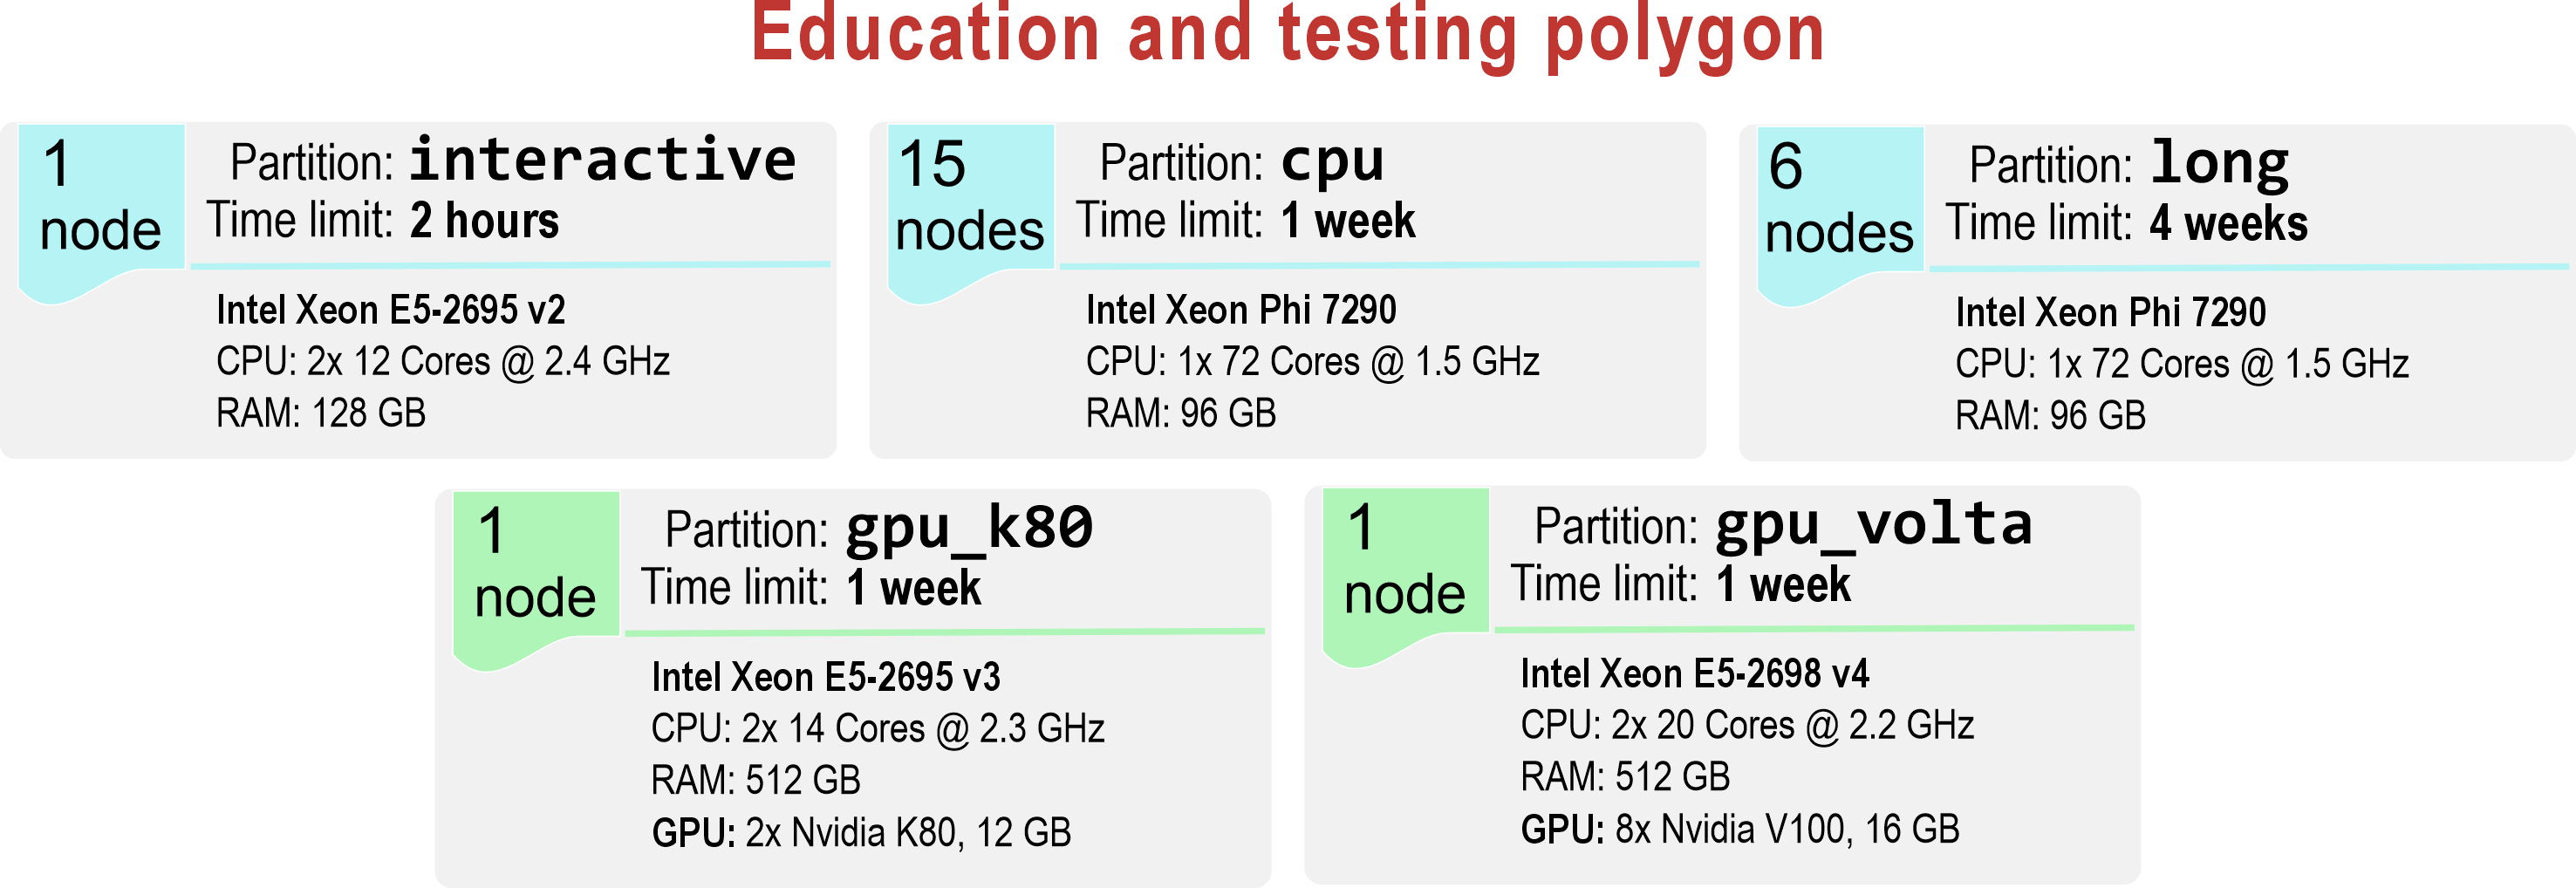
Currently, HybriLIT provides 5 queues:
- interactive* — includes one compute node with 2 × Intel Xeon E5-2695 v2 (12 cores each). This queue is suitable for running test programs. The maximum wall time is 2 hours. (*The asterisk indicates that this is the default queue.)
- cpu — includes 15 compute nodes, each with one Intel Xeon Phi (72 cores). This queue is intended for CPU-based applications. The maximum wall time is 7 days.
- long — includes 6 compute nodes, each with one Intel Xeon Phi (72 cores). This queue is suitable for long-running applications with execution times of up to 4 weeks.
- gpu_k80 — includes one compute node with 2 × Intel Xeon E5-2695 v3 (14 cores each) and 2 × NVIDIA Tesla K80 GPUs. This queue is intended for GPU-accelerated applications. The maximum wall time is 7 days.
- gpu_volta — includes one compute node with 2 × Intel Xeon E5-2698 v4 (20 cores each) and 8 × NVIDIA V100 GPUs. This queue is suitable for long-running GPU applications with execution times of up to 7 days.
Operating System and Software Environment
The heterogeneous platform runs AlmaLinux 9.6 and uses the SLURM workload manager.
The installed software environment includes compilers and development tools for building, debugging, and profiling parallel applications, as well as the Lmod module system.
Data Storage and Processing Systems
To improve reliability and performance, several data storage and processing systems are available to users on the platform.
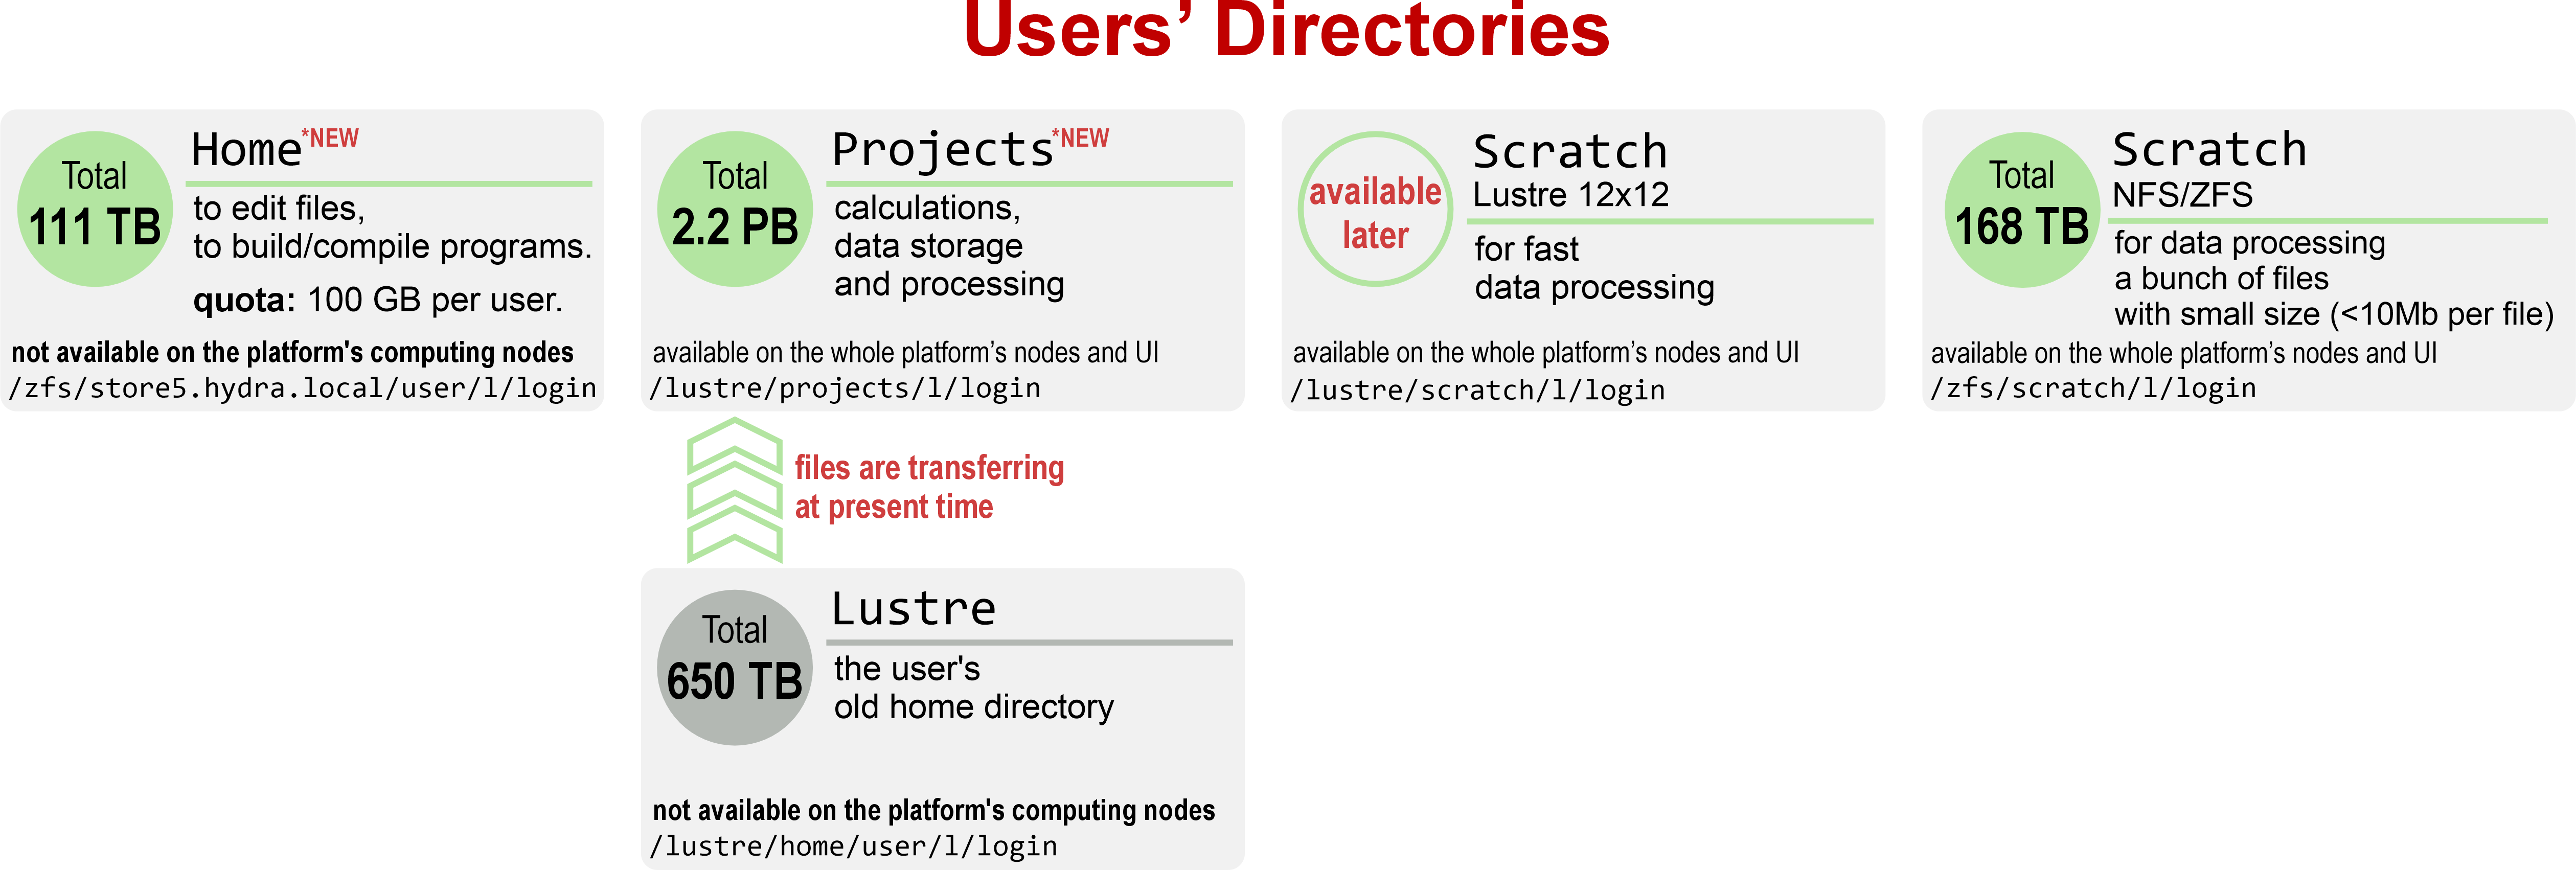
1. Home
User home directory:/zfs/store5.hydra.local/user/l/login
This directory is intended for editing files and building/compiling programs. Each user has a 100 GB quota. The home directory is not intended for running computations and is not accessible on compute nodes.
2. Project
User project directory:/lustre/projects/l/login
This directory is intended for running computations and storing working files (executables, input, and output files) during job execution. No quota is applied, and the directory is accessible on compute nodes.
3. Scratch Lustre 12×12*
High-performance scratch directory:/lustre/scratch/l/login (*will be available later)
This directory is located on the Lustre 12×12 file system, which is optimized for high I/O workloads. It is intended for massively parallel applications with intensive input/output operations. Files stored in Scratch Lustre 12×12 are not guaranteed to be preserved for more than 90 days.
4. Scratch NFS/ZFS
Backup scratch directory:/zfs/scratch/l/login
This directory is hosted on an NFS/ZFS file system and is intended for jobs that process a large number of small files (less than 10 MB each). Files stored in Scratch NFS/ZFS are not guaranteed to be preserved for more than 90 days.
5. Lustre (Legacy Home Directory)
Old user home directory:/lustre/home/user/l/login
At present, files are being migrated from the previous storage system to the current project directory /lustre/projects. This process may take some time. Please do not worry — all data are preserved and will be fully transferred.
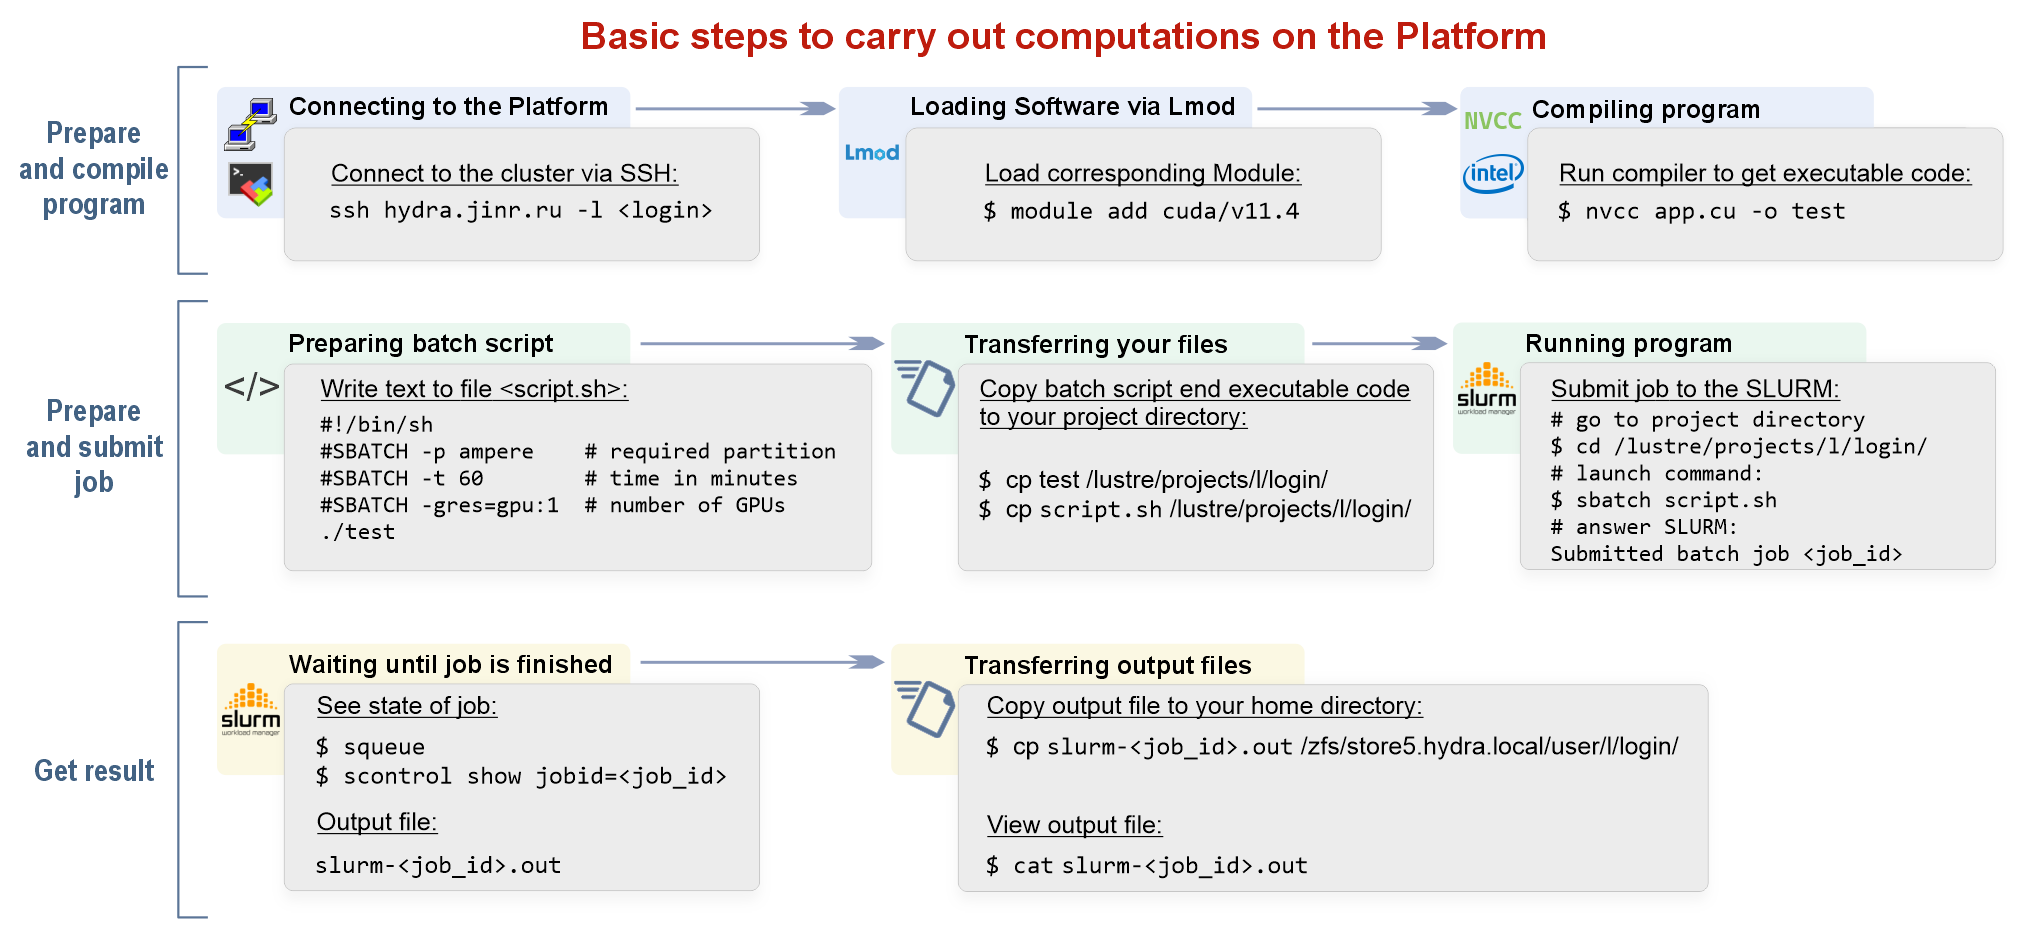
Basic steps for making calculations on the platform
Getting Started: Remote Access to the Platform
Remote access to the HybriLIT heterogeneous computing platform is available only via SSH.
DNS address:hydra.jinr.ru
Detailed connection instructions for different operating systems are provided below.
For Linux Users
Open a terminal and run:
ssh USERNAME@hydra.jinr.ru
where USERNAME is the login you received during registration, and hydra.jinr.ru is the server address. When prompted, enter your password. Upon successful authentication, you will see a command prompt:
[USERNAME@hydra ~] $
This indicates that you are connected to the platform and located in your home directory. During the first connection attempt, you may see a warning about an unknown host. Type yes and press Enter to add the host to the list of known hosts.
For Windows Users
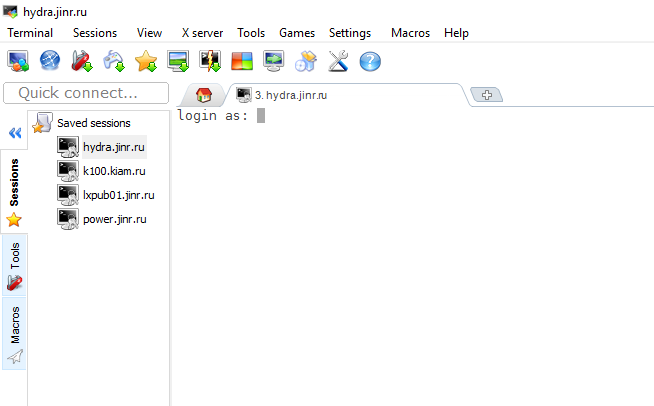
Windows users must use an SSH client such as PuTTY or MobaXterm.
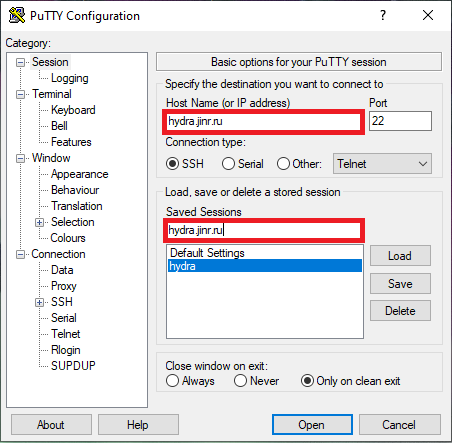
Connecting with PuTTY
PuTTY does not require installation. Download putty.exe from: http://the.earth.li/~sgtatham/putty/latest/x86/putty.exe. Save it to a convenient location and run it.
PuTTY configuration steps:
- In the Host Name (or IP address) field, enter: hydra.jinr.ru
- In Saved Sessions, enter a name for the connection (e.g., hydra.jinr.ru)
- To enable remote graphical applications (X11):
- Go to Connection → SSH → X11
- Enable X11 forwarding
- Verify that Connection → SSH → Tunnels has Local ports accept connections from other hosts enabled

- Return to the Session tab and click Save
- Click Open to connect to the HybriLIT platform
- Enter your login and password when prompted
After successful authentication, you will see:
|
1 |
<span lang="EN-GB" style="color: black;">[USERNAME@hydra ~] $</span> |
This confirms that you are connected and located in your home directory. During the first connection, typeyes when prompted to confirm the server identity.
Installing and Using MobaXterm
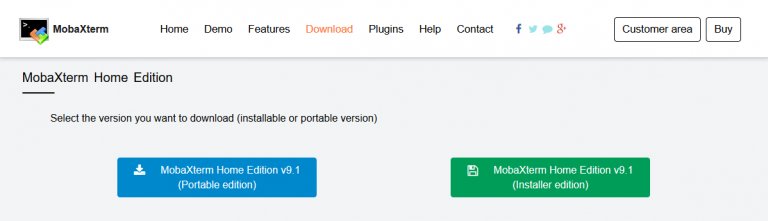
- Visit mobaxterm.mobatek.net and download either:
- the portable version (no installation required), or
- the installer version (recommended below)
2. Run MobaXterm_Setup_XX.exe and follow the standard installation steps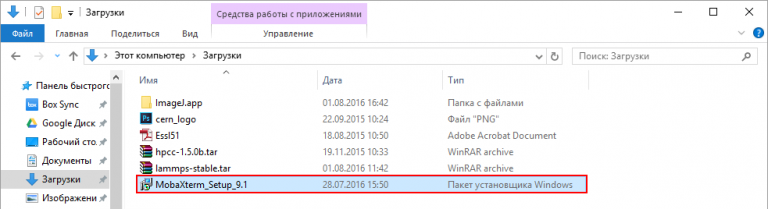
3. After installation, launch MobaXterm using the desktop shortcut
4. From the top menu, select Sessions → New session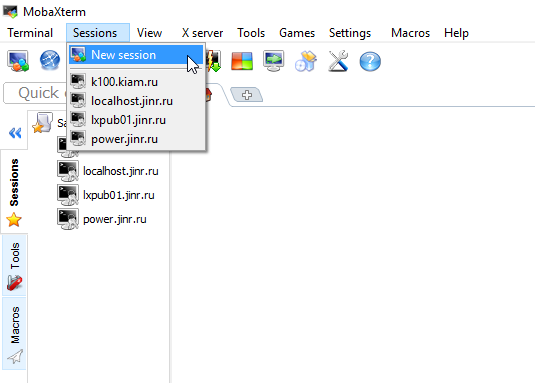
5. Enter hydra.jinr.ru in the Remote host field and click OK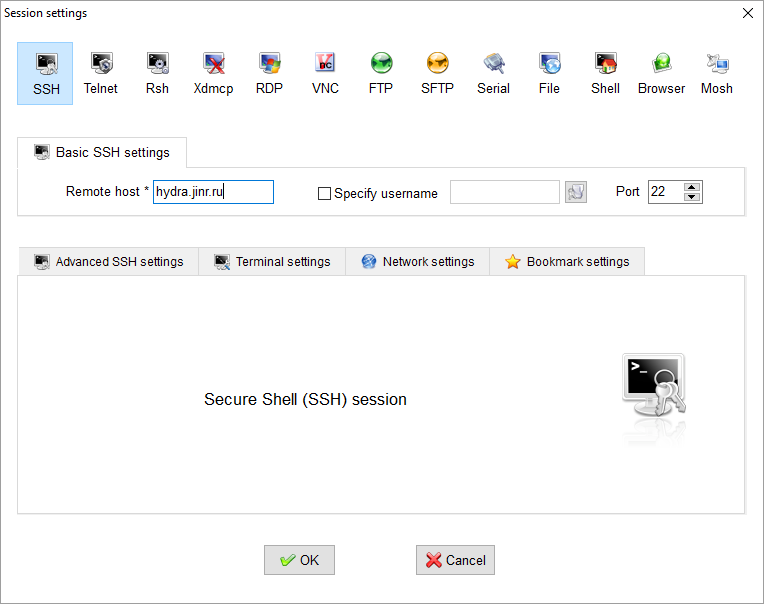
6. A new tab will open. Enter your login and password. Upon successful authentication, you will see:
Lmod Module System
The platform uses Lmod 9.1.2 for dynamic environment management.
Lmod allows users to:
- Switch between different compilers
- Build applications using major programming languages (C/C++, Fortran, Java)
- Use parallel programming technologies (OpenMP, MPI, OpenCL, CUDA)
- Access software packages installed on the platform
Before compiling applications, required modules must be loaded.
Common module commands
|
1 2 3 4 5 |
module avail — list available modules module add <MODULE_NAME> — load a module module list — list loaded modules module rm <MODULE_NAME> — unload a module module show <MODULE_NAME> — show module detail |
![]() Loaded modules are not preserved between sessions.
Loaded modules are not preserved between sessions.
To load modules automatically, add the following command to ~/.bashrc:
|
1 |
module add <MODULE_NAME> |
You can also use compilers and software installed via CernVM File System (CVMFS).
CernVM File System
Adding CernVM-FS to the available software stack provides access to CERN software.
To list available packages: ls /cvmfs/sft.cern.ch/lcg/releases
The directory /cvmfs/sft.cern.ch/ is mounted dynamically and may disappear after a period of inactivity.
To remount it, simply run the command above again.
To use compilers and software packages: source <PATH_TO_ENVIRONMENT_FILE>
Basic Linux Commands
|
Command |
Description |
|---|---|
| man <command> | display manual for a command |
| man -k <keyword> | search commands related to a keyword |
|
File and directory operations |
|
| ls | list files |
| ls -la | detailed list including hidden files |
| cd <directory> | change directory |
| cp <source> <destination> | copy files |
| mv <source> <destination> | move or rename files |
| ln -s <target> <link> | create symbolic link |
| rm <file> | delete file |
| rm -r <directory> | delete directory recursively |
|
File viewing and editing |
|
| cat <file> | display file contents |
| more <file> | paginated output |
| less <file> | interactive file viewer (q to quit) |
| nano <file> | edit file with Nano |
| vim <file> | edit file with Vim |
| pico <file> | edit file with Pico |
|
Utilities |
|
| find <directory> -name <filename> | find files |
| tar -zxvf <file> | extract tgz or tar.gz archives |
| mc | launch Midnight Commander |
| man mc | Midnight Commander documentation |
|
Standard Commands |
|
| pwd | print current directory |
| whoami | show current username |
| date | show current date and time |
| time <program> | measure execution time |
| ps -a | list active processes |
| chmod <access_rights><file> | change access rights to a file that you own |
| *Access types: | |
| – r | read |
| – w | write |
| – x | execute |
| – – | no permission |
| User types: | |
| — u | owner |
| — g | group |
| — o | others |
| Examples: | |
| chmod a+r zara | Grants read access to everyone (all=user+group+others) |
| chmod o-x zara | Removes execute permission from others |
| chown <owner> <files> | change file owner |
| chgrp <group> <files> | change group |
| ls -l <file> | view permissions |
|
Process Control |
|
| <file> | grep <pattern> | search text in file |
| man grep | help about the command |
| ps axu | grep <username> | list user processes |
| kill <pid> | terminate process |
| killall <program> | terminate all processes by name |
SLURM Job Scheduler
SLURM is a scalable, fault-tolerant, open-source cluster resource manager and job scheduler that provides:
- Allocation of exclusive or shared access to compute nodes
- Execution and monitoring of parallel jobs
- Job queue management and load balancing
1. Basic SLURM Commands
- sbatch— submit a batch job
- squeue— view job queue
- sinfo— view node and partition status
- scancel— cancel a job
- scontrol— view or modify SLURM state
Example:
|
1 2 |
sbatch runscript.sh Submitted batch job 141980 |
2. Partitions (Queues)
HybriLIT provides the following partitions:
- interactive* — 1 node, Intel Xeon E5-2695 v2 (12 cores ×2), up to 2 hours (default)
- cpu— 15 nodes, Intel Xeon Phi (72 cores), up to 7 days
- long— 6 nodes, Intel Xeon Phi (72 cores), up to 4 weeks
- gpu_k80— 1 node, 2× Xeon E5-2695 v3 + 2× NVIDIA Tesla K80, up to 7 days
- gpu_volta— 1 node, 2× Xeon E5-2698 v4 + 8× NVIDIA V100, up to 7 days
3. SLURM Script Files
Jobs are submitted using a script file, which is a standard Bash script with the following rules:
- First line: #!/bin/sh or #!/bin/bash
- Lines starting with # are comments
- Lines starting with #SBATCH define SLURM parameters
- All SLURM parameters must be defined before launching the application
Required / recommended parameters:
- -p— partition
- -n— number of processes
- -t— wall time (required)
- –gres— number of GPUs or coprocessors
- –mem— memory in MB (optional)
- -N— number of nodes
- -o— output file
Examples
CPU job:
|
1 2 3 4 |
#!/bin/sh #SBATCH -p cpu #SBATCH -t 60 ./a.out |
GPU job:
|
1 2 3 4 5 |
#!/bin/sh #SBATCH -p gpu_volta #SBATCH -t 60 #SBATCH --gres=gpu:2 ./a.out |
Examples for specific programming technologies will be provided in the corresponding sections.
Compilation and Execution of OpenMP Applications
OpenMP (Open Multi-Processing) is an open standard for developing multithreaded programs in C, C++, and Fortran. It provides a set of compiler directives, library routines, and environment variables intended for the development of multithreaded applications on shared-memory multiprocessor systems.
The programming model used is the Fork–Join Model, which operates as follows (Fig. 1):
Any program starts execution in a single thread (the master thread). The master thread then creates a team of threads using compiler directives (FORK), which execute in parallel. After the parallel region completes, all threads synchronize (JOIN), and the program continues execution in the master thread.
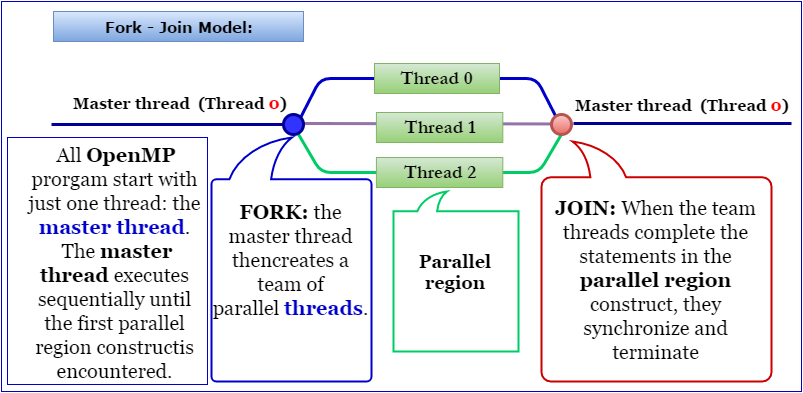
Fig. 1. Fork–Join programming model.
Compilation
Standard compilers with OpenMP support are used. Both GNU and Intel compilers are available. GNU compilers versions 12.3.0 and 13.1.0 support OpenMP.
Before compiling with Intel compilers, the corresponding module must be loaded:
|
1 |
$ module add intel/v2025.3.1 |
Currently, two Intel compiler versions are available:
- 1.0— Intel Classic compilers (icc, icpc)
- 3.1— optimized compilers (icx, icpx)
Compilation commands for C, C++, and Fortran are shown below:
| Intel 2023 | Intel 2025 | GNU | |
|---|---|---|---|
| C | icc -qopenmp hello.c | icx -qopenmp hello.c | gcc -fopenmp hello.c |
| C++ | icpc -qopenmp hello.cpp | icpx -qopenmp hello.cpp | g++ -fopenmp hello.cpp |
| Fortran | ifort -qopenmp hello.f | ifx -qopenmp hello.f | gfortran -fopenmp hello.f |
Upon successful compilation, an executable binary file is produced. By default, the executable name is a.out. A different name can be specified using the -o option. For example:
|
1 |
$ icx -qopenmp hello.c -o hello |
|
1 |
$ ifx -qopenmp hello.f -o hello |
Execution
OpenMP applications are executed using a script file containing the following information:
|
1 |
#!/bin/sh<br />#SBATCH -p cpu # select partition<br />#SBATCH -c 5 # number of computing threads<br />#SBATCH -t 60 # wall time<br />./test # run application |
To optimize thread placement and typically reduce execution time, it is recommended to set:
|
1 |
$ export OMP_PLACES=cores |
The number of OpenMP threads can be set via the OMP_NUM_THREADS environment variable:
|
1 |
$ export OMP_NUM_THREADS=threads |
where threads is the desired number of OpenMP threads.
A recommended script for an OpenMP application using 5 threads:
|
1 |
#!/bin/sh<br />#SBATCH -p cpu<br />#SBATCH -c 5<br />#SBATCH -t 60<br />export OMP_NUM_THREADS=5<br />export OMP_PLACES=cores<br />./a.out |
The application is submitted using:
|
1 |
$ sbatch omp_script |
Compilation and Execution of MPI Applications
Message Passing Interface (MPI) is a programming interface (API) for information exchange that enables communication between processes executing a single task.
Both GNU and Intel compilers support MPI.
GNU Compilers
MPI programs can be compiled with GNU compilers using the OpenMPI library. GNU compilers are installed by default on HybriLIT. To access OpenMPI libraries, load module 5.0.9:
|
1 |
$ module add openmpi/v5.0.9_gcc1230 |
Compilation
Ниже представлены команды для компиляции программ, написанных на С, С++ или Fortran для GNU-компилятора:
| Language | Compiler Command |
|---|---|
| C | mpicc |
| C++ | mpiCC / mpic++ / mpicxx |
| Fortran 77 | mpif77 / mpifort (*) |
| Fortran 90 | mpif90 / mpifort (*) |
![]()
It is recommended to use mpifort instead of the deprecated mpif77 or mpif90.
Example (C):
|
1 |
$ mpicc example.c |
If no executable name is specified, the output file defaults to a.out.
Execution Script Example (OpenMPI)
|
1 |
#!/bin/sh<br />#SBATCH -p cpu<br />#SBATCH --nodes=2<br />#SBATCH --ntasks-per-node=3<br />#SBATCH -t 60<br />mpirun ./a.out |
Intel Compilers
To use MPI with Intel compilers, load one of the following modules:
|
1 |
$ module add intel/v2023.1.0 |
or
|
1 |
$ module add intel/v2025.3.1 |
The MPI library is included in these modules.
Compilation Commands
| Language | Intel/v2023.1.0 | Intel/v2025.3.1 |
|---|---|---|
| C | mpiicc | mpiicx |
| C++ | mpiicpc | mpiicpx |
| Fortran | mpiifort | mpiifort |
Example:
|
1 |
$ mpiifort example.f |
Compiler Optimization Options
| Option | Description |
|---|---|
| -O0 | no optimization (default for GNU) |
| -O2 | default for Intel |
| -O3 | may be effective for certain applications |
| -march=native -march=core2 | tune for CPU architecture |
Job Submission
Jobs are submitted using the SLURM scheduler:
|
1 |
$ sbatch script_mpi |
where script_mpi is a predefined job script.